
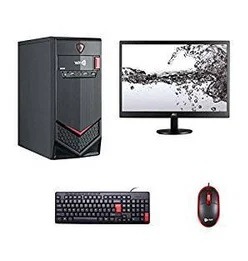
Computer assembly set by set
Assembling a computer from scratch can be an exciting and rewarding DIY project. Here’s a step-by-step guide to help you assemble a computer set by set:
Set 1: Gathering Components
- Select Components:
- Choose a compatible CPU, motherboard, RAM, storage, graphics card (if needed), power supply, and case.
- Ensure components are compatible by checking specifications and compatibility guides.
Set 2: Preparing the Workspace
- Clean and Clear Space:
- Choose a clean, well-lit, and static-free workspace.
- Gather tools like screwdrivers, anti-static wrist strap, and cable ties.
Set 3: Installing CPU and Cooler
- CPU Installation:
- Carefully open the CPU socket on the motherboard.
- Gently place the CPU in the correct orientation and secure it.
- Close the socket and latch.
- Cooler Installation:
- Apply thermal paste (if not pre-applied) onto the CPU.
- Attach the CPU cooler, aligning it with the mounting holes.
- Secure the cooler with screws or clips.
Set 4: Installing RAM
- RAM Installation:
- Open the RAM slots on the motherboard.
- Insert the RAM sticks in the correct orientation until they click into place.
Set 5: Installing Storage
- Storage Installation:
- Install the storage devices (SSD or HDD) into their respective drive bays.
- Connect the data cables to the storage devices and motherboard.
Set 6: Installing the Motherboard
- Motherboard Installation:
- Place the motherboard into the case, aligning it with the standoffs.
- Secure the motherboard to the case using screws.
Set 7: Connecting Cables
- Power Supply Connections:
- Connect the main 24-pin power cable from the power supply to the motherboard.
- Connect the CPU power cable (4-pin or 8-pin) to the motherboard.
- Front Panel Connectors:
- Connect the front panel cables (power button, reset button, LEDs, etc.) to the motherboard.
- Data Cables:
- Connect SATA data cables from storage devices to the motherboard.
Set 8: Installing Graphics Card (if needed)
- Graphics Card Installation:
- Insert the graphics card into the appropriate PCIe slot on the motherboard.
- Secure the graphics card to the case using screws.
Set 9: Cable Management
- Organize Cables:
- Use cable ties or Velcro straps to bundle and route cables neatly.
- Ensure good airflow and prevent cable interference.
Set 10: Powering On and Testing
- Final Checks:
- Double-check all connections and components for correctness.
- Power On:
- Connect the power cord to the power supply and the wall outlet.
- Press the power button to turn on the computer.
- BIOS Setup:
- Enter the BIOS/UEFI settings to configure boot order, date/time, and other settings.
What is required Computer assembly set by set
Assembling a computer from scratch requires careful planning, compatible components, tools, and step-by-step execution. Here’s a detailed breakdown of what’s required for computer assembly, set by set:
Set 1: Preparing Your Workspace
- Clean Workspace:
- Choose a clean, well-lit, and static-free area to work in.
- Tools:
- Screwdriver set (including both Phillips and flat-head screwdrivers).
- Anti-static wrist strap to prevent static electricity damage.
Set 2: Gathering Components
- Central Processing Unit (CPU):
- Check compatibility with the chosen motherboard.
- Ensure the CPU is not damaged.
- Motherboard:
- Ensure it’s compatible with the CPU and other components.
- Check for any physical damage.
- Memory (RAM):
- Choose compatible RAM modules for your motherboard.
- Make sure you have the correct amount of RAM for your needs.
- Storage:
- Decide between Solid State Drives (SSDs) and Hard Disk Drives (HDDs).
- Choose the storage capacity that suits your needs.
- Graphics Card (Optional):
- Required for gaming or graphic-intensive tasks.
- Ensure compatibility with the motherboard and power supply.
- Power Supply Unit (PSU):
- Select a PSU with sufficient wattage for your components.
- Check for modular or non-modular options based on your cable management preference.
- Case:
- Choose a case that accommodates your components and provides good airflow.
- Consider cable management options.
- Cooling:
- Depending on the CPU and case, you might need additional cooling solutions.
- Cables and Accessories:
- SATA cables for storage devices.
- Various power cables.
- Additional case fans if needed.
Set 3: Component Installation
- Installing CPU and Cooler:
- Handle the CPU carefully and align it with the socket.
- Apply thermal paste before attaching the cooler.
- Mounting RAM:
- Insert RAM modules into the appropriate slots.
- Mounting Storage:
- Install SSDs or HDDs in designated drive bays.
- Installing Graphics Card (Optional):
- Insert the GPU into the PCI e slot and secure it.
- Mounting Motherboard:
- Place the motherboard in the case and secure it with standoffs and screws.
Set 4: Cable Connections
- Power Supply Connections:
- Connect main 24-pin and CPU power cables to the motherboard.
- Connect PCI e power cables if using a dedicated GPU.
- Front Panel Connectors:
- Connect power button, reset button, LED lights, and USB ports to the motherboard.
- Data Cables:
- Connect SATA data cables from storage devices to the motherboard.
Set 5: Finishing Touches and Testing
- Cable Management:
- Organize and secure cables using ties or clips.
- Ensure good airflow and tidy appearance.
- Final Checks:
- Double-check all connections and components.
- Make sure no loose screws or cables are obstructing fans.
- Power On and Testing:
- Connect the power cord and monitor.
- Power on the computer and check if all components are functioning.
Once you’ve successfully assembled the computer, you can proceed to install the operating system, drivers, and software to complete the setup.
Who is required Computer assembly set by set
When assembling a computer set by set, various individuals play essential roles to ensure a successful and functional build. Here are the key people involved in the computer assembly process:
- Computer Enthusiast or DIY Builder:
- This is typically the individual who is assembling the computer.
- They research, select, and purchase the components based on their needs and preferences.
- They follow the step-by-step instructions and physically assemble the computer components.
- Component Retailer or Supplier:
- Provides the individual with the necessary computer components, such as the CPU, motherboard, RAM, storage, graphics card, power supply, case, and other accessories.
- Offers information about compatibility and specifications to assist in component selection.
- Technical Support (Optional):
- Some component retailers or manufacturers offer technical support to assist with compatibility questions, troubleshooting, and any issues that arise during assembly.
- Online Resources and Communities:
- Various online forums, communities, and tutorial websites offer guidance, advice, and troubleshooting tips for individuals assembling their own computers.
- Manufacturer Support (Optional):
- Some computer part manufacturers provide technical documentation, installation guides, and customer support to assist with the assembly process.
- Friends or Peers (Optional):
- Individuals with experience in computer assembly can provide guidance, advice, and assistance during the process.
It’s important to note that while assembling a computer can be a rewarding and educational experience, it requires careful attention to detail, patience, and knowledge of computer hardware components. If you’re unsure about any aspect of the assembly process, seeking assistance from experienced individuals, online communities, or manufacturer support can be incredibly helpful.
When is required Computer assembly set by set
Assembling a computer set by set is required when you want to build a custom computer from individual components rather than purchasing a pre-built system. This approach allows you to tailor the computer’s specifications to your specific needs, preferences, and budget. Here are situations where computer assembly set by set might be necessary or beneficial:
- Specific Hardware Requirements: When you need a computer with specific hardware components that might not be available in pre-built systems. For example, if you require a powerful graphics card for gaming or specialized software, you can select components accordingly.
- Cost Savings: Building a computer set by set can often be more cost-effective compared to purchasing a pre-built system with similar specifications. You have more control over where to allocate your budget.
- Customization: If you want a unique and personalized computer with a particular case design, lighting effects, or cooling solutions, assembling it yourself allows for customization.
- Upgradeability: Building your own computer makes it easier to upgrade individual components in the future. You can replace parts like the CPU, GPU, RAM, or storage without needing to replace the entire system.
- Learning and Experience: Assembling a computer provides a hands-on learning experience about how different hardware components work together. It’s an opportunity to gain technical skills and knowledge.
- Gaming or Specialized Use: Gamers, content creators, programmers, and professionals working with resource-intensive applications might require specific configurations optimized for their tasks.
- Satisfaction and Achievement: For many enthusiasts, building a computer is a satisfying achievement. Seeing your creation come to life and perform tasks can be immensely rewarding.
- Challenge and Hobby: If you enjoy technical challenges or have a passion for computers, building a system can be an enjoyable hobby.
- Unique Requirements: Some industries or professions have unique hardware requirements that might not be met by off-the-shelf systems. Assembling a computer allows you to tailor the system to those needs.
- Control Over Components: You have control over the quality of each component, ensuring you select reliable parts from trusted manufacturers.
While building a computer set by set offers numerous advantages, it’s
Where is required Computer assembly set by set
Computer assembly set by set is typically required in situations where you want to create a custom computer system from individual components. This approach allows you to tailor the computer’s specifications and features to your specific needs and preferences. Here are some scenarios where computer assembly set by set might be necessary or beneficial:
- Home Use: If you need a computer for general home use, such as web browsing, email, multimedia consumption, and light productivity tasks, assembling a computer set by set can help you create a cost-effective and efficient system.
- Gaming: Gamers often prefer custom-built systems to ensure high performance and compatibility with the latest games. Building a gaming PC set by set allows you to choose powerful processors, graphics cards, and sufficient cooling solutions.
- Content Creation: Professionals working with graphic design, video editing, 3D modeling, and other resource-intensive tasks can benefit from a custom-built system optimized for their specific software and hardware requirements.
- Programming and Development: Developers may require a computer with specific hardware configurations for software development, virtualization, and running multiple applications simultaneously.
- Specialized Applications: Industries such as engineering, scientific research, data analysis, and simulation often demand customized hardware setups that can be achieved through computer assembly set by set.
- Home Theater PC (HTPC): If you’re building a media center for streaming content, watching movies, or playing media files, assembling a compact HTPC with specific multimedia capabilities can be advantageous.
- Server or Network Setup: For home or small business use, you might need to build a dedicated server or network-attached storage (NAS) system with specific hardware components and storage capacities.
- Learning and Skill Development: Assembling a computer set by set can be an educational experience, helping individuals learn about computer hardware, troubleshooting, and system configuration.
- Cost-Effectiveness: Building a computer set by set can often be more cost-effective than purchasing a pre-built system, especially when you already have some components or when you’re reusing parts from an older computer.
- Customization and Aesthetics: If you want a unique and aesthetically pleasing computer with specific case designs, lighting effects, and cooling solutions, assembling it yourself allows for customization.
It’s important to note that while building a computer set by set offers flexibility and customization, it requires some technical knowledge, careful component selection, and attention to detail. If you’re unfamiliar with computer assembly, you can seek guidance from experienced individuals, online tutorials, or communities dedicated to DIY computer building.
How is required Computer assembly set by set
Assembling a computer set by set involves a series of steps that require careful planning, attention to detail, and some technical know-how. Here’s a step-by-step guide on how to assemble a computer set by set:
Step 1: Research and Planning
- Define Purpose: Determine the primary use of the computer (gaming, content creation, general use, etc.) to guide component selection.
- Set Budget: Determine your budget for the entire build, including all components.
- Component Selection: Choose compatible components such as CPU, motherboard, RAM, storage, GPU, power supply, case, and cooling solutions based on your needs and budget.
Step 2: Gather Tools and Components
- Tools: Gather necessary tools such as a screwdriver set, anti-static wrist strap, cable ties, and thermal paste.
- Components: Ensure you have all selected components, cables, and accessories.
Step 3: Preparing the Workspace
- Clean Workspace: Choose a clean, well-lit, and static-free area to work in.
- Anti-Static Precautions: Wear an anti-static wrist strap to prevent damaging components with static electricity.
Step 4: Assembling the Computer
- Install CPU and Cooler:
- Align and install the CPU into the motherboard’s CPU socket.
- Apply a small amount of thermal paste if necessary.
- Attach the CPU cooler following the manufacturer’s instructions.
- Install RAM:
- Open the RAM slots on the motherboard.
- Insert the RAM modules firmly but gently until they click into place.
- Mount Storage:
- Install SSDs or HDDs in the designated drive bays in the case.
- Connect data and power cables to the storage devices and motherboard.
- Install Graphics Card:
- Insert the graphics card into the appropriate PCIe slot on the motherboard.
- Secure the graphics card to the case using screws.
- Mount Motherboard:
- Place the motherboard into the case, aligning it with the standoffs.
- Secure the motherboard to the case using screws.
- Cable Connections:
- Connect the main 24-pin power cable from the power supply to the motherboard.
- Connect the CPU power cable (4-pin or 8-pin) to the motherboard.
- Connect front panel connectors (power button, reset button, LEDs, USB ports) to the motherboard.
- Connect data cables (SATA) from storage devices to the motherboard.
- Install Power Supply:
- Mount the power supply in the designated area of the case.
- Connect power cables to the motherboard, GPU, and other components.
Step 5: Cable Management
- Organize Cables: Bundle and route cables neatly for proper airflow and aesthetics.
Step 6: Final Checks and Testing
- Check Connections: Double-check all connections, components, and cables.
- Power On and Testing:
- Connect the power cord and monitor.
- Power on the computer and check if all components are functioning.
- Enter BIOS/UEFI to confirm components are recognized.
Step 7: Operating System Installation
- Install OS: Install the operating system (Windows, Linux, etc.) from a bootable USB drive or disc.
Step 8: Drivers and Updates
- Install Drivers: Install drivers for components such as graphics card, motherboard, and other peripherals.
Step 9: Finalization
- Software and Personalization: Install software, customize settings, and personalize the computer.
Congratulations! You’ve successfully assembled a computer set by set. Remember to consult the manuals and guides for each component for detailed instructions and precautions. If you encounter any issues or are unsure about any step, seek guidance from experienced individuals or online resources.
Case study on Computer assembly set by set
Case Study: Custom Gaming Computer Assembly
Background: John is an avid gamer who wants to build a high-performance gaming computer to enjoy the latest games at optimal settings. He has decided to assemble the computer set by set to ensure it meets his specific requirements and offers the best gaming experience.
Objectives: John’s goal is to build a custom gaming computer that delivers smooth gameplay, high graphics fidelity, and future upgradeability.
Components Selected:
- CPU: AMD Ryzen 7 5800X
- Motherboard: ASUS ROG Strix B550-F Gaming
- RAM: Corsair Vengeance RGB Pro 32GB (2x16GB) DDR4 3200MHz
- GPU: NVIDIA GeForce RTX 3080
- Storage: Samsung 970 EVO Plus 1TB NVMe SSD
- Power Supply: EVGA SuperNOVA 850 G+ 80 Plus Gold
- Case: NZXT H510i Compact ATX Mid-Tower
Set 1: Research and Planning John thoroughly researches each component, comparing specifications, reviews, and compatibility. He sets a budget and ensures all chosen components are compatible with one another.
Set 2: Gathering Tools and Components John collects necessary tools, including screwdrivers, an anti-static wrist strap, and cable ties. He orders all components from various retailers and ensures their availability.
Set 3: Preparing the Workspace John designates a clean and well-lit workspace in his room. He places an anti-static mat and wears an anti-static wrist strap to prevent damage to components.
Set 4: Assembling the Computer John carefully follows the manufacturer’s instructions for each component:
- He installs the CPU into the motherboard’s socket, applying thermal paste and attaching the CPU cooler.
- John inserts the RAM modules into the DIMM slots and secures them.
- He mounts the Samsung SSD onto the motherboard’s M.2 slot.
- John installs the ASUS motherboard into the NZXT case, connecting all necessary cables.
Set 5: Cable Management John takes time to neatly route and manage cables using the cable channels and tie-down points in the NZXT case. Proper cable management ensures good airflow and aesthetics.
Set 6: Final Checks and Testing Before powering on, John double-checks all connections and components. He connects the monitor, keyboard, and mouse, then powers on the computer. He enters the BIOS to ensure all components are recognized.
Set 7: Operating System Installation John creates a bootable USB drive with Windows 10 and installs the operating system onto the Samsung SSD.
Set 8: Drivers and Updates Once Windows is installed, John installs the latest drivers for the motherboard, GPU, and other components. He also updates Windows to ensure optimal performance.
Set 9: Finalization John installs gaming software, customizes settings, and sets up RGB lighting for an immersive gaming experience.
Outcome: John successfully assembles his custom gaming computer set by set. He is thrilled with the performance and graphical capabilities of the system. The computer runs the latest games smoothly at high settings, and John enjoys a seamless gaming experience. He plans to upgrade components in the future to keep up with evolving gaming technologies.
White paper on Computer assembly set by set
Title: The Art and Science of Computer Assembly: A Comprehensive Guide to Building Your Own PC
Abstract: This white paper delves into the intricacies of computer assembly, providing a comprehensive guide for enthusiasts and beginners alike. Building a computer from scratch offers a rewarding and educational experience, allowing individuals to tailor their systems to specific needs and preferences. Through a detailed exploration of the step-by-step process, component selection, best practices, and troubleshooting, this white paper aims to empower readers with the knowledge required to successfully assemble a computer set by set.
Table of Contents:
- Introduction
- Importance of Custom Computer Assembly
- Benefits of Building a PC Set by Set
- Understanding Computer Components
- Overview of Essential Hardware Components
- Importance of Component Compatibility
- Planning and Preparation
- Defining Purpose and Requirements
- Setting Budget and Component Selection
- Gathering Tools and Components
- Essential Tools for Successful Assembly
- Comprehensive Component Checklist
- Workspace Setup and Safety
- Creating an Optimal Work Environment
- Preventing Static Electricity Damage
- Step-by-Step Assembly Process
- Preparing the Motherboard and CPU
- Mounting RAM and Storage Devices
- Installing Graphics Card (if applicable)
- Connecting Power Supply and Cables
- Finalizing the Build with Cable Management
- BIOS Configuration and Testing
- Accessing and Navigating the BIOS/UEFI
- Ensuring Proper Component Recognition
- Initial Testing and Troubleshooting
- Operating System Installation
- Creating Bootable Media for OS Installation
- Installing and Configuring the Operating System
- Driver Installation and System Optimization
- Installing Essential Drivers and Updates
- Optimizing System Performance and Stability
- Customization and Personalization
- Installing Software and Applications
- Configuring User Preferences and Settings
- Maintenance and Upgrades
- Tips for Regular System Maintenance
- Exploring Future Upgrade Possibilities
- Troubleshooting and Problem-Solving
- Identifying and Resolving Common Assembly Issues
- Resources for Advanced Troubleshooting
- Benefits and Impact
- Educational Value of DIY Computer Assembly
- Environmental Considerations and E-Waste Reduction
- Conclusion
- The Empowerment of DIY Computer Assembly
- Encouragement for Continued Learning and Exploration
This white paper serves as a comprehensive guide for both novice and experienced individuals interested in assembling their own computers. By following the detailed insights and instructions provided, readers can embark on a journey of discovery, creativity, and self-expression through the art and science of computer assembly.