Computer assembly set by set
Certainly, I can provide you with a basic outline of the steps involved in assembling a computer. Keep in mind that computer assembly can vary based on the components you have and their compatibility. Here’s a general guide to assembling a desktop computer:
1. Preparing the Workspace:
- Choose a clean, well-lit area to work.
- Use an anti-static wrist strap to ground yourself and prevent static discharge.
2. Gathering Components:
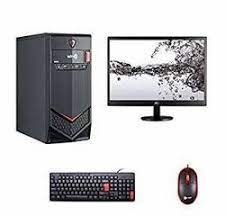
- Ensure you have all the necessary components: CPU, motherboard, RAM, storage, power supply, graphics card (if applicable), cooling system, case, and peripherals.
3. CPU and RAM Installation:
- Install the CPU into the socket on the motherboard.
- Attach the CPU cooler according to the manufacturer’s instructions.
- Insert RAM modules into the appropriate slots on the motherboard.
4. Motherboard Installation:
- Place the I/O shield in the case.
- Carefully align the motherboard’s ports with the I/O shield and screw the motherboard onto the standoffs inside the case.
5. Storage Installation:
- Install the storage devices (SSD, HDD) in the appropriate drive bays or slots on the case.
6. Power Supply Installation:
- Install the power supply unit (PSU) in the dedicated PSU chamber of the case.
- Connect the necessary power cables to the motherboard, CPU, graphics card, and storage devices.
7. Graphics Card Installation (if applicable):
- Insert the graphics card into the appropriate PCI e slot on the motherboard.
- Secure the graphics card using screws or clips.
8. Cable Management:
- Organize and route cables neatly to ensure proper airflow and aesthetics.
- Use cable ties or clips to secure cables.
9. Front Panel Connectors:
- Connect the case’s front panel connectors (power button, reset button, USB ports, audio ports) to the corresponding headers on the motherboard.
10. Cooling System Installation:
- If you have an aftermarket CPU cooler, attach it according to the manufacturer’s instructions.
11. Testing:
- Connect a monitor, keyboard, and mouse.
- Power on the system to ensure all components are working properly and to access the BIOS settings.
12. Operating System Installation:
- Insert the operating system installation media (USB or DVD) and follow the prompts to install the OS.
13. Driver Installation:
- Install drivers for motherboard, graphics card, and other components.
14. Software and Updates:
- Install necessary software and updates for optimal performance.
15. Final Checks:
- Check temperatures, voltages, and system stability using monitoring software.
- Run stress tests to ensure the system’s stability under load.
Please note that this is a basic outline of the computer assembly process. The specific steps and requirements can vary based on the components you have and the type of computer you’re building. Always refer to the manuals provided by the component manufacturers for detailed instructions. If you’re unsure about any step, consider seeking assistance from experienced individuals or professionals.
What is required Computer assembly set by set
Assembling a computer requires careful handling of components and adherence to specific steps to ensure everything is properly connected and functional. Here’s a detailed step-by-step guide to computer assembly:
1. Gather Necessary Tools:
- Screwdriver set (Phillips head)
- Anti-static wrist strap
- Workspace with good lighting
2. Prepare Components:
- Ensure you have all the necessary components: CPU, motherboard, RAM, storage, power supply, graphics card (if applicable), cooling system, case, and peripherals.
3. Preparing the Case:
- Place the case on a flat surface with the open side facing up.
- Install the I/O shield into the rectangular opening at the back of the case.
4. Install CPU:
- Open the CPU socket on the motherboard and carefully place the CPU into it.
- Lock the CPU in place according to the motherboard’s instructions.
5. Apply Thermal Paste (if required):
- If the CPU cooler does not have pre-applied thermal paste, apply a small amount to the center of the CPU.
6. Attach CPU Cooler:
- Attach the CPU cooler to the CPU socket using the provided brackets or clips.
- Make sure it’s securely fastened, following the manufacturer’s instructions.
7. Install RAM:
- Align the notches on the RAM modules with the notches on the RAM slots.
- Gently press down until the clips on the sides of the slot click into place.
8. Mount Motherboard:
- Carefully place the motherboard onto the standoffs in the case.
- Align the I/O ports with the I/O shield and secure the motherboard with screws.
9. Connect Power Supply:
- Install the power supply into its designated area in the case.
- Connect the necessary power cables to the motherboard, CPU, GPU, and storage devices.
10. Install Storage Devices:
- Connect SSDs, HDDs, or M.2 drives to the appropriate connectors on the motherboard.
11. Install Graphics Card (if applicable):
- Insert the graphics card into the appropriate PCIe slot and secure it with the retention bracket or screws.
12. Connect Case Cables:
- Connect the front panel connectors (power button, reset button, LEDs, USB ports) to the motherboard headers.
- Connect case fans to the appropriate fan headers on the motherboard.
13. Cable Management:
- Organize cables neatly and use cable ties or clips to secure them.
- Ensure good airflow for cooling.
14. Testing:
- Connect the monitor, keyboard, and mouse.
- Power on the system to ensure all components are functional.
- Enter BIOS settings if required.
15. Operating System Installation:
- Insert the operating system installation media (USB/DVD) and follow the prompts to install the OS.
16. Install Drivers and Software:
- Install motherboard, graphics card, and other component drivers.
- Install necessary software and updates.
17. Final Checks:
- Run stress tests and monitoring software to check system stability and temperatures.
- Make any necessary adjustments based on test results.
18. Finish Up:
- Close the case and secure it with screws.
- Organize and tidy up cables for better aesthetics.
Remember, this is a general guide, and specific steps might vary depending on the components you have and their compatibility. Always refer to the manuals provided by component manufacturers for detailed instructions. If you’re unsure about any step, seek assistance from experienced individuals or professionals.
Who is required Computer assembly set by set
Computer assembly is typically performed by individuals who have an understanding of hardware components, their compatibility, and the technical skills required to put them together. While assembling a computer can be a DIY project, it’s important to have the necessary knowledge to ensure a successful and functional build. Here are the individuals who might be involved in computer assembly:
- Enthusiastic Individuals:
- Many tech enthusiasts enjoy building their own computers as a hobby or to customize their systems according to their preferences.
- Gamers and Content Creators:
- Gamers and content creators often build high-performance computers tailored to their specific needs, such as gaming, video editing, or 3D rendering.
- Students and Professionals:
- Students studying computer science or related fields might assemble computers to gain hands-on experience and practical knowledge.
- IT Professionals:
- IT professionals may build computers for specific purposes, such as servers, workstations, or lab environments.
- Small Business Owners:
- Small businesses without an IT department might assemble computers for their office needs to save costs and customize configurations.
- Computer Enthusiast Communities:
- Online communities and forums provide guidance and support for individuals looking to build their own computers.
- PC Builders or Technicians:
- Some individuals work as PC builders or technicians, assembling computers for clients or customers.
- Technical Educators:
- Teachers or trainers might guide students through the process of assembling computers as part of an educational program.
It’s important to note that while computer assembly can be a rewarding and educational experience, it also requires a certain level of technical knowledge. If you’re not familiar with hardware components or feel unsure about any step, seeking advice from experienced individuals or professionals can help ensure a successful build.
When is required Computer assembly set by set
Computer assembly is required when you need to build a new computer system from individual components. There are various situations where assembling a computer set by set might be necessary:
- Customization: When you want to customize the hardware components of your computer to meet specific performance or usage requirements.
- Upgrade: If you have an existing computer but want to upgrade certain components (such as CPU, GPU, RAM, or storage) to improve performance.
- Specific Use Cases: Building a computer tailored to specific use cases, such as gaming, video editing, 3D rendering, machine learning, or server hosting.
- Cost Efficiency: Assembling your own computer can be more cost-effective than purchasing a pre-built system, especially if you already have some components.
- Learning Experience: If you’re interested in learning about computer hardware, assembly offers a hands-on opportunity to understand how components work together.
- Unavailability of Pre-Built Systems: In some cases, you might have specific hardware requirements that are not available in pre-built systems.
- Unique Configurations: If you have unique requirements or configurations that aren’t commonly available, assembling a computer allows you to achieve your desired setup.
- Personal Satisfaction: For tech enthusiasts, assembling a computer can be a satisfying and rewarding experience.
- Education: Students studying computer science, engineering, or related fields might need to assemble computers as part of their coursework.
- Replacement: When a component in your existing computer system fails, you might need to replace it and perform an assembly.
- Business Needs: Small businesses or startups might assemble computers for office use, saving costs and tailoring configurations.
It’s important to assess your technical knowledge and comfort level before attempting to assemble a computer, especially if you’re new to hardware. If you’re uncertain about any aspect of the process, seeking advice from experienced individuals or professionals can help ensure a successful build.
Where is required Computer assembly set by set
Computer assembly set by set is typically performed in a controlled and well-prepared environment. Here are some common places where computer assembly takes place:
- Personal Workspace:
- Many individuals assemble computers in their own homes. A clean and organized workspace is essential to avoid static discharge and keep components safe.
- DIY Enthusiast Communities:
- Online forums and communities dedicated to DIY computer building often share step-by-step guides, tutorials, and tips for successful assembly.
- IT Labs or Workshops:
- Educational institutions, such as colleges or technical schools, might have dedicated labs or workshops where students learn and practice computer assembly.
- Professional Workshops:
- Computer shops or technical service centers may have workshops for assembling computers, either for customers or as part of training programs.
- Small Business or Startup Office:
- Small businesses that need custom computer systems for their operations might assemble computers in their office spaces.
- Tech Event or Conferences:
- Tech events, workshops, and conferences sometimes offer hands-on sessions for assembling computers.
- Tech Repair Centers:
- Computer repair shops or service centers may assemble computers as part of their services.
- Tech Enthusiast Gatherings:
- Tech meetups, LAN parties, or other enthusiast gatherings may involve participants showcasing or assembling computers.
- Maker Spaces or Hackerspaces:
- Community spaces focused on technology, DIY projects, and learning often provide resources and tools for computer assembly.
- Home Studios:
- Content creators or streamers who require powerful systems might assemble computers in their home studios.
Remember that wherever you choose to assemble a computer, it’s important to have a clean, static-free environment. Additionally, access to proper tools, good lighting, and sufficient space for organizing components are key factors to ensure a successful and safe assembly process. If you’re new to computer assembly, it’s recommended to seek guidance from experienced individuals or follow detailed guides to avoid potential mistakes.
How is required Computer assembly set by set
Performing a computer assembly set by set involves following a series of systematic steps to ensure that each component is correctly installed and connected. Here’s a detailed breakdown of the process:
1. Gather Tools and Components:
- Collect the necessary tools, including a screwdriver, anti-static wrist strap, and workspace with good lighting.
- Ensure you have all the components needed for the build, such as CPU, motherboard, RAM, storage, power supply, graphics card (if applicable), cooling system, case, and peripherals.
2. Prepare the Workspace:
- Choose a clean, flat surface for assembly.
- Wear an anti-static wrist strap to prevent static discharge.
3. Install CPU:
- Open the CPU socket on the motherboard.
- Gently place the CPU into the socket, ensuring proper orientation.
- Secure the CPU by latching or locking it into place.
4. Apply Thermal Paste (if required):
- If your CPU cooler doesn’t have pre-applied thermal paste, apply a small amount onto the CPU.
5. Attach CPU Cooler:
- Attach the CPU cooler according to the manufacturer’s instructions.
- Ensure proper alignment and secure it with brackets or screws.
6. Install RAM:
- Align the notches on the RAM modules with the notches on the RAM slots.
- Press down firmly until the clips on the sides click into place.
7. Mount Motherboard:
- Place the motherboard onto the standoffs in the case.
- Align the I/O ports with the I/O shield on the case.
- Secure the motherboard using screws.
8. Connect Power Supply:
- Install the power supply into its designated area in the case.
- Connect power cables to the motherboard, CPU, GPU, and storage devices.
9. Install Storage Devices:
- Connect SSDs, HDDs, or M.2 drives to the appropriate connectors on the motherboard.
10. Install Graphics Card (if applicable): – Insert the graphics card into the appropriate PCIe slot on the motherboard. – Secure it using the retention bracket or screws.
11. Connect Case Cables: – Connect the case’s front panel connectors (power button, LEDs, USB ports) to the motherboard headers. – Connect case fans to the appropriate fan headers on the motherboard.
12. Cable Management: – Organize and route cables neatly to ensure proper airflow and aesthetics. – Use cable ties or clips to secure cables.
13. Testing: – Connect the monitor, keyboard, and mouse. – Power on the system to ensure components are functional. – Access BIOS settings if necessary.
14. Operating System Installation: – Insert the operating system installation media (USB/DVD) and follow prompts to install the OS.
15. Install Drivers and Software: – Install drivers for motherboard, graphics card, and other components. – Install necessary software and updates.
16. Final Checks: – Run stress tests and monitoring software to check system stability and temperatures. – Make any necessary adjustments based on test results.
17. Finish Up: – Close the case and secure it with screws. – Organize cables for better aesthetics.
Throughout the assembly process, refer to component manuals for specific instructions. If you’re unsure about any step, consider seeking assistance from experienced individuals or professionals to ensure a successful build.
Case study on Computer assembly set by set
Certainly! Let’s consider a case study of John, an enthusiastic individual with a passion for technology, who decides to assemble a computer set by set:
Case Study: John’s Computer Assembly Adventure
Background: John is a tech enthusiast who enjoys learning about computer hardware and building his own systems. He wants to build a high-performance gaming rig that suits his gaming and content creation needs.
Goals:
- Assemble a custom gaming computer from scratch.
- Gain hands-on experience in computer hardware assembly.
- Create a powerful system for gaming and content creation.
Steps Taken:
Step 1: Research and Planning
- John spends time researching the latest hardware components, reading reviews, and comparing specifications.
- He sets a budget and creates a list of compatible components, including CPU, GPU, RAM, storage, motherboard, and more.
Step 2: Gathering Components
- John purchases the chosen components from reputable sources, making sure they are compatible with each other.
- He receives all the components, including a mid-tower case, an Intel Core i7 CPU, an NVIDIA GeForce RTX graphics card, SSD and HDD storage, DDR4 RAM, and a modular power supply.
Step 3: Workspace Setup
- John prepares his workspace, ensuring it’s clean and well-lit.
- He wears an anti-static wrist strap to prevent damage from static electricity.
Step 4: System Assembly
- Following the motherboard manual, John installs the CPU, applying thermal paste and attaching the CPU cooler.
- He inserts the RAM modules into the appropriate slots, ensuring they click into place.
- Carefully, he mounts the motherboard into the case using standoffs and screws.
Step 5: Connecting Components
- John connects the power supply cables to the motherboard, CPU, GPU, and storage drives.
- He connects the case’s front panel connectors, USB ports, and audio jacks to the motherboard headers.
Step 6: Graphics Card Installation
- John installs the NVIDIA GeForce RTX graphics card into the PCI Ce slot and secures it with screws.
- He connects the necessary power cables to the graphics card.
Step 7: Cable Management
- John carefully routes and organizes cables to ensure good airflow and aesthetics.
- He uses cable ties to bundle and secure cables in place.
Step 8: Testing and Setup
- John connects a monitor, keyboard, and mouse to the system.
- He powers on the computer to ensure all components are working and enters the BIOS to configure settings.
Step 9: Operating System Installation
- John inserts a Windows installation USB drive and installs the operating system.
Step 10: Finalization
- After the OS installation, John installs drivers for the motherboard, graphics card, and other components.
- He installs software and updates for gaming and content creation.
Results:
- John successfully assembles his custom gaming computer set by set, gaining valuable hands-on experience in the process.
- The computer performs exceptionally well in gaming and content creation tasks, meeting his expectations.
Impact:
- John’s self-assembled computer provides him with a sense of accomplishment and a powerful system that suits his interests and needs.
- He continues to learn and experiment with hardware, considering future upgrades and builds.
Key Takeaways: This case study highlights how John’s enthusiasm and willingness to learn allowed him to successfully assemble a custom gaming computer. By carefully following each step, conducting thorough research, and seeking guidance when needed, John achieved his goal of building a powerful and personalized system.
White paper on Computer assembly set by set
Certainly, here’s an example of a white paper on computer assembly, detailing the process of assembling a computer set by set:
Title: White Paper on Computer Assembly Set by Set
Abstract: This white paper provides a comprehensive guide to assembling a computer set by set, offering step-by-step instructions and insights for individuals looking to build their own systems. From choosing compatible components to connecting peripherals, this paper aims to equip readers with the knowledge and confidence to undertake a successful DIY computer assembly project.
Table of Contents:
- Introduction
- Significance of computer assembly as a DIY project.
- Benefits of customizing a computer system according to individual needs.
- Planning and Component Selection
- Researching hardware components: CPU, motherboard, RAM, storage, GPU, etc.
- Compatibility considerations and creating a budget.
- Formulating a component list for the build.
- Preparing the Workspace and Tools
- Setting up a clean, static-free workspace.
- Essential tools and safety measures: anti-static wrist strap, screwdriver, cable ties, etc.
- Step-by-Step Assembly Process
- Detailed instructions for assembling components in the correct order.
- Installing the CPU, CPU cooler, RAM, motherboard, storage devices, and graphics card.
- Connecting power supply cables and front panel connectors.
- Cable Management and Airflow Optimization
- Importance of organized cable management for aesthetics and airflow.
- Techniques for routing and securing cables within the case.
- Testing and Initial Setup
- Connecting peripherals: monitor, keyboard, mouse.
- Powering on the system to verify component functionality.
- Accessing BIOS settings for initial configuration.
- Operating System Installation and Driver Setup
- Installing the chosen operating system using installation media.
- Installing drivers for motherboard, graphics card, and other components.
- Setting up necessary software and updates.
- Stress Testing and Monitoring
- Running stress tests to check system stability and thermal performance.
- Using monitoring software to track temperatures, voltages, and system health.
- Troubleshooting and Tips
- Common challenges during assembly and potential solutions.
- Troubleshooting hardware or software issues that may arise.
- Conclusion
- Recap of the computer assembly process set by set.
- Emphasis on the empowerment and learning opportunities gained from DIY computer assembly.
References
- List of sources and references cited throughout the white paper.