
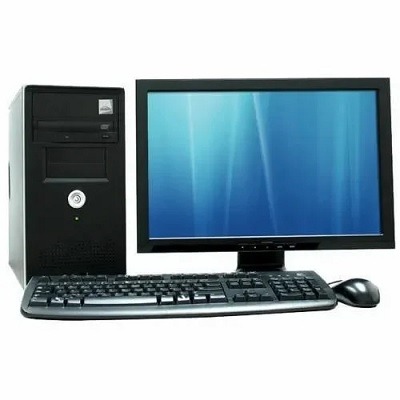
Computer assembly set by set
Building a computer from scratch can be an exciting and rewarding experience. Here is a step-by-step guide to assembling a computer:
- Gather all the Components:
- Central Processing Unit (CPU)
- Motherboard
- Random Access Memory (RAM)
- Storage (Hard Drive or Solid State Drive)
- Power Supply Unit (PS U)
- Graphics Card (if required)
- Case
- Cooling system (fans or liquid cooling)
- Peripherals (keyboard, mouse, monitor, etc.)
- Prepare the Workspace:
- Choose a clean, well-lit, and static-free area to work in.
- Place an anti-static mat or wear an anti-static wristband to prevent damage to sensitive components.
- Install the CPU:
- Locate the CPU socket on the motherboard.
- Lift the CPU retention arm, align the notches on the CPU with those on the socket, and gently place the CPU in.
- Close the retention arm to secure the CPU in place.
- Install the CPU Cooler:
- Apply thermal paste to the surface of the CPU (if necessary).
- Attach the CPU cooler according to the manufacturer’s instructions, ensuring it is properly seated and making contact with the CPU.
- Install the RAM:
- Locate the RAM slots on the motherboard.
- Align the notch on the RAM module with the key in the RAM slot and insert the RAM module firmly but gently until it clicks into place.
- Repeat for additional RAM modules if required.
- Install the Storage and Graphics Card:
- Install the storage drive (hard drive or solid-state drive) into the appropriate drive bay in the case, using screws or brackets as needed.
- If using a dedicated graphics card, insert it into the PCI e slot on the motherboard, ensuring it is fully seated and secure.
- Connect Cables and Power Supply:
- Connect the necessary power cables from the power supply unit to the motherboard, CPU, storage drives, and graphics card.
- Connect the data cables (SAT A or M.2) from the storage drives to the appropriate connectors on the motherboard.
- Install the Motherboard:
- Place the motherboard into the case, aligning the I/O ports with the corresponding openings on the case.
- Secure the motherboard to the case using screws, ensuring it is mounted firmly but not overly tightened.
- Connect Front Panel Cables:
- Connect the front panel connectors (power switch, reset switch, LED s, USB ports, audio jacks) from the case to the corresponding headers on the motherboard, referring to the motherboard manual for proper pin configurations.
- Connect Peripherals:
- Connect the peripherals such as keyboard, mouse, and monitor to the appropriate ports on the motherboard or graphics card.
- Double-Check Connections:
- Ensure all cables and components are properly connected and seated.
- Check for any loose screws or cables that may interfere with the operation of the computer.
- Close the Case:
- Carefully close and secure the computer case, ensuring all screws are tightened properly.
- Power On:
- Connect the power cord to the power supply and plug it into a power outlet.
- Press the power button on the computer case to turn it on.
- Install Operating System and Drivers:
- Insert the installation media (DVD or USB) for the operating system (e.g., Windows) and follow the on-screen instructions to install it.
- Install the necessary drivers for components such as the graphics card, motherboard, and peripherals.
- Test and Troubleshoot:Power on the computer and ensure that all components are functioning correctly.Monitor temperatures, check for any abnormal behavior, and
- What is required Computer assembly set by set
- To assemble a computer, you will need the following components:
- Central Processing Unit (CPU): The brain of the computer that performs calculations and executes instructions.
- Motherboard: The main circuit board that connects and allows communication between various components.
- Random Access Memory (RAM): Provides temporary storage for data and instructions that the CPU needs to access quickly.
- Storage: This can be a Hard Disk Drive (HDD) or a Solid State Drive (SS D) to store the operating system, programs, and files.
- Power Supply Unit (PS U): Supplies power to the computer’s components.
- Graphics Card: Required for gaming or graphics-intensive tasks. It handles the processing and rendering of visual data.
- Case: The enclosure that houses all the components and provides physical protection.
- Cooling System: Fans or liquid cooling systems to prevent the components from overheating.
- Peripherals: Keyboard, mouse, monitor, and other input/output devices.
- Cables and Connectors: SAT A cables to connect storage drives, power cables to supply power to components, and various other connectors to link the components.
- Operating System: The software that manages computer hardware and software resources.
- Tools: Screwdrivers, cable ties, and other basic tools for assembling and securing the components.
It’s important to note that specific components may vary depending on your specific requirements and budget. Additionally, it’s crucial to ensure compatibility between the components (e.g., the CPU and motherboard socket type) to avoid any issues during assembly. Referencing the documentation and manuals that come with the components is highly recommended.
- Who is required Computer assembly set by set
- The process of assembling a computer can be completed by an individual who possesses the necessary knowledge, skills, and patience. While it is not mandatory to have professional expertise, having a basic understanding of computer hardware and following step-by-step instructions is essential. Here are the key individuals involved in the computer assembly process:
- Computer Enthusiast: An individual who has an interest in computers, enjoys learning about technology, and is enthusiastic about building their own computer. They may have prior experience or may be embarking on their first computer assembly project.
- DI Y Enthusiast: A do-it-yourself enthusiast who enjoys hands-on projects and has experience with assembling various objects or systems. They are typically comfortable working with tools and following detailed instructions.
- Tech-savvy Individual: An individual who possesses a good understanding of computer hardware, components, and their compatibility. They may have experience working with computers or have a background in IT or related fields.
- Computer Technician: A professional who specializes in computer repair, troubleshooting, and assembly. They have in-depth knowledge of computer hardware, software, and configurations. Computer technicians can assist with complex builds or troubleshooting issues during the assembly process.
It is worth noting that while assembling a computer can be done by individuals, there are also pre-built computer options available in the market for those who prefer a hassle-free experience or do not have the time or interest in assembling their own system.
- When is required Computer assembly set by set
- The need for computer assembly set by set arises in various situations, including:
- Custom-Built Systems: When individuals want to build a computer with specific components tailored to their needs and preferences. This allows them to select the desired hardware, such as a powerful CPU, ample RAM, or a high-end graphics card, to meet their specific requirements, whether it’s for gaming, graphic design, video editing, or other specialized tasks.
- Upgrading Existing Systems: When individuals want to upgrade their current computer by replacing or adding components. This could involve installing a faster CPU, increasing the RAM capacity, or upgrading to a faster storage drive. Upgrading can extend the lifespan and enhance the performance of an existing computer without having to purchase an entirely new system.
- Learning and Educational Purposes: Assembling a computer from scratch provides a valuable learning experience, especially for individuals who are interested in understanding the inner workings of computers or pursuing a career in IT, computer science, or related fields. By going through the assembly process, individuals gain practical knowledge about computer hardware, connectivity, and troubleshooting.
- Cost Optimization: Building a computer from individual components can sometimes be a cost-effective alternative to buying a pre-built system. By carefully selecting components and taking advantage of sales and promotions, individuals can build a computer with similar or better specifications than a pre-built system at a potentially lower cost.
- Specific Requirements: Certain industries or professions may have specialized computing needs that cannot be fully met by off-the-shelf systems. For example, professionals in fields such as audio engineering, 3D modeling, or scientific research may require specific hardware configurations tailored to their demanding tasks. Assembling a computer set by set allows for customization to meet these unique requirements.
Ultimately, the decision to assemble a computer set by set depends on the individual’s specific needs, preferences, budget, and level of technical expertise. It offers flexibility, customization options, and a deeper understanding of computer hardware and its assembly process.
- Where is required Computer set by set
- Computer assembly set by set can be done in various locations depending on the individual’s preference and resources available. Here are some common places where computer assembly takes place:
- Home: Many individuals choose to assemble their computers in the comfort of their own homes. This allows for a familiar environment, access to necessary tools, and the flexibility to work at their own pace. Home workshops, desks, or dedicated workstations can serve as suitable spaces for computer assembly.
- DI Y Workshops: Some enthusiasts may have dedicated DI Y workshops or work spaces equipped with tools, workbenches, and appropriate lighting. These spaces provide a dedicated area for computer assembly projects and may offer additional resources or specialized equipment.
- Tech Community Spaces: In certain areas, there may be community workshops or maker spaces that provide shared work spaces and tools for individuals interested in various DI Y projects, including computer assembly. These spaces often foster a collaborative and supportive environment, allowing individuals to share knowledge and experiences.
- Retail Stores: Some computer hardware retailers or electronics stores offer computer assembly services or workshops. They may provide designated areas with workbenches, tools, and expert assistance for customers interested in building their own computers. These spaces allow individuals to access professional guidance and support during the assembly process.
- Professional Service Centers: Individuals who prefer professional assistance or lack the confidence to assemble a computer themselves can opt for professional service centers or computer repair shops. These establishments often offer computer assembly services where experienced technicians can build the computer set by set according to the individual’s specifications and requirements.
When choosing a location for computer assembly, it is important to consider factors such as available space, required tools, access to resources, and the level of support or expertise needed. Regardless of the location, it is essential to work in a clean, well-lit area and follow proper electrostatic discharge (ES D) precautions to prevent damage to sensitive computer components.
- How is required Computer assembly set by set
-
To assemble a computer set by set, follow these general steps:
- Prepare the Workspace:
- Choose a clean and well-lit area to work.
- Ensure you have a suitable work surface and access to necessary tools.
- Gather the Components:
- Collect all the required computer components, including the CPU, motherboard, RAM, storage drives, power supply unit (PS U), graphics card (if applicable), case, cooling system, and peripherals.
- Review the Documentation:
- Familiarize yourself with the documentation and manuals provided with each component.
- Pay attention to compatibility requirements, installation instructions, and any specific precautions.
- Install the CPU:
- Open the CPU socket on the motherboard and align the CPU correctly.
- Gently place the CPU into the socket, ensuring it fits properly.
- Lock the CPU in place using the retention mechanism.
- Install the CPU Cooler:
- Apply thermal paste to the CPU (if required).
- Attach the CPU cooler according to the manufacturer’s instructions.
- Ensure it is firmly and evenly attached to the CPU.
- Install the RAM:
- Identify the RAM slots on the motherboard.
- Align the notch on the RAM module with the key in the slot and insert it firmly until it clicks into place.
- Repeat the process for additional RAM modules if needed.
- Install Storage Drives:
- Install the storage drives (HDD s or SSD s) into their respective drive bays in the case.
- Connect the data and power cables to the drives and the motherboard.
- Install the Graphics Card:
- Insert the graphics card into the appropriate PCI e slot on the motherboard.
- Ensure it is fully seated and securely attached.
- Connect any necessary power cables to the graphics card.
- Mount the Motherboard:
- Place the motherboard into the case, aligning it with the standoffs.
- Secure the motherboard to the case using screws, ensuring it is properly grounded.
- Connect Cables and Components:
- Connect the power supply cables to the motherboard, CPU, storage drives, and graphics card.
- Connect the front panel connectors (power switch, LED s, USB ports) to the motherboard.
- Connect any additional cables, such as SAT A cables for storage drives or audio cables.
- Install the Cooling System:
- Install the case fans or liquid cooling system according to the manufacturer’s instructions.
- Ensure proper airflow and cooling for the components.
- Install Peripherals:
- Connect the keyboard, mouse, monitor, and any other peripherals to the appropriate ports on the motherboard or graphics card.
- Double-Check Connections:
- Review all connections and cables to ensure they are properly secured and connected.
- Close the Case:
- Close the computer case and secure it with the appropriate screws or fasteners.
- Power On and Test:
- Connect the power cord to the PS U and plug it into a power outlet.
- Press the power button to turn on the computer and verify that all components are functioning correctly.
It is important to consult the specific documentation and manuals provided by the component manufacturers for detailed instructions on installation and configuration. Following proper handling and safety measures, such as grounding yourself and avoiding static electricity, is crucial to prevent damage to the components during the assembly process.
Case study on Computer assembly set by set
Case Study: Custom Gaming Computer Assembly
Background: A gaming enthusiast named Alex wants to build a high-performance gaming computer from scratch to meet their specific gaming needs. They have a budget and a desire to have complete control over the components used in their system. Alex has moderate knowledge of computer hardware and has assembled computers in the past but is seeking a more advanced and customized build this time.
Objectives:
- Build a high-performance gaming computer that can handle the latest AAA games at maximum settings.
- Optimize the system for smooth game play, fast load times, and efficient multitasking.
- Stay within the specified budget while maximizing performance.
Steps Taken:
- Research and Component Selection:
- Alex conducted extensive research on the latest hardware components, including CPU s, GPU s, RAM, storage options, and power supplies.
- They compared performance benchmarks, customer reviews, and compatibility factors to select the best components within their budget.
- After careful consideration, Alex chose a high-end CPU, a powerful graphics card, ample RAM, and a fast SS D for storage.
- Component Acquisition:
- Alex purchased the selected components from reputable online retailers, ensuring they were all compatible and met their performance requirements.
- They waited for the components to arrive, carefully inspecting each item upon delivery to ensure no damage occurred during shipping.
- Workspace Preparation:
- Alex set up a clean, well-lit workspace with the necessary tools and an anti-static mat to prevent electrostatic discharge.
- They organized the components and reviewed the documentation provided by each manufacturer.
- Assembly Process:
- Alex started by installing the CPU onto the motherboard, applying thermal paste and attaching the CPU cooler according to the manufacturer’s instructions.
- They then installed the RAM modules into the appropriate slots, ensuring they were fully seated and properly aligned.
- Next, Alex mounted the motherboard inside the chosen computer case, connecting the necessary cables and securing it in place.
- They installed the storage drive and graphics card, making sure to connect the required power and data cables.
- Alex completed the assembly by connecting the power supply unit to all components, including the motherboard, GPU, and storage drives.
- They double-checked all connections and cable management before closing the computer case.
- System Testing and Setup:
- After the physical assembly, Alex connected the necessary peripherals, including a gaming keyboard, mouse, and monitor.
- They powered on the computer and entered the BIOS to verify that all components were recognized correctly.
- Alex installed the operating system, drivers, and essential software, optimizing the system for gaming performance.
- They conducted stress tests, bench marking, and game play sessions to ensure the computer performed as expected and met their objectives.
Results: Alex successfully assembled a custom gaming computer that met their desired objectives. The system delivered high-performance gaming experiences with smooth game play, fast load times, and efficient multitasking. By selecting quality components and carefully assembling them, Alex achieved a well-built and optimized gaming rig within their specified budget.
- Prepare the Workspace:
- To assemble a computer, you will need the following components: